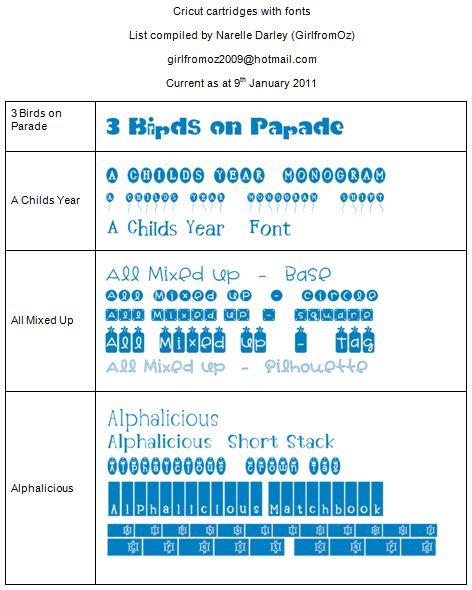
I had no idea how many "non-font" cartridges actually have a font on them until I started putting this list together!
So A FULL DAY AND A HALF later.... here it is. Hope I haven't missed any!
US (letter) V3 (February 2011) here: http://www.mediafire.com/?pvsw1jv2a7r1n1u
Only print pages 22 & 23 if you already have V2)
A4 V3 (February 2011) here: http://www.mediafire.com/?abopgqq7mhcr30r
(Only print pages 20 & 21 if you already have V2)
Sunday, 9 January 2011
Saturday, 1 January 2011
HAPPY NEW YEAR!
It's 2011!
Wishing you all a Happy New Year.
May all your Cricut days be happy ones!
Tuesday, 28 December 2010
Transferring cut files to and from your Gypsy
Please note: The latest versions of Cricut Sync have mostly stopped the ability to transfer files to and from the Gypsy. PC are apparently working on a fix for this but haven't giving any indication of when that will be available.
If you have an old version of Cricut Sync (or even Gypsy Sync) you can use that to transfer your files.
There’s more than one way to transfer cut files to and from your Gypsy. This is the way I find the easiest and quickest:
1. Use Save As to save your DS file as a Gypsy file by clicking on the "Save As type" drop down box and selecting Gypsy files. Make sure you give it a new name. (Delete everything in the file name box after the c:/ and type in a new name)
2. Close the DS file. (You can leave DS open, just make sure your file is closed.)
3. Connect your Gypsy to your computer using the USB cord and power the Gypsy on.
4. Start the Cricut Sync program from your computer. (You may have to exit out of your Virus/firewall software if Gypsy screen doesn't move from showing CONNECTING)
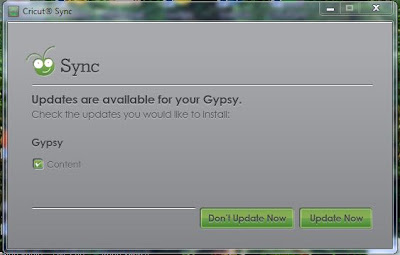
If your Gypsy is up to date you will get this message:
5. Click the OK button and you’ll see the list of files on your Gypsy
(If you aren’t running the most recent Gypsy update you will need to run that first. Then come back here and start again at step 4. Here’s info on that: UPDATING GYPSY TUTORIAL )
6. When your Gypsy screen shows CONNECTED… open up Windows Explorer on your computer.
7. Adjust the size of the Windows Explorer window so it only covers half of your screen.
Your computer screen should look something like this:
8. Navigate to the directory that contains the file you created with Design Studio. (Usually c:/mydocuments/cricut/projects)
9. Using your left mouse button click (and hold) on the file you want to copy to your Gypsy and drag it over to the Gypsy screen.
10. Release the mouse button and the file will appear in the list of Gypsy files. (You can use the Ctrl key to select and copy multiple files)
11. When you have finished copying your files, click on the X in the top right corner of the Cricut Sync program to exit.
You’ll be taken back to the Gypsy Welcome screen.
12. Disconnect your Gypsy from your computer.
You’re now ready to use the file on your Gypsy.
1. To transfer your Gypsy files to Design Studio we do the same basic process as above. At step 9 above click on the file from the Gypsy screen and drag it over and drop it into the Projects folder in Windows Explorer.
2. Once you have copied it to the projects folder, open Design Studio. (You can exit out of Cricut Sync now and disconnect from your computer)
3. In DS Select File, Open
4. Change the drop down File Name box to Gypsy Files
5. Select the Gypsy file you want to open and press Open
6. To cut the file with DS you will need to select File, Save As, give it a new name and select Cricut Files from the Save as Type drop down menu.
7. Give it a new name and press Save.
Don't forget: Files that are created on the Gypsy that have hidden contours will have those contours visible in DS. You will have to select each one and hide them again. (This is a known problem with the Hide Contour feature in DS). If you want to keep contours hidden always save your file as a Gypsy file.
If you have an old version of Cricut Sync (or even Gypsy Sync) you can use that to transfer your files.
There’s more than one way to transfer cut files to and from your Gypsy. This is the way I find the easiest and quickest:
Transferring DS files to the Gypsy
1. Use Save As to save your DS file as a Gypsy file by clicking on the "Save As type" drop down box and selecting Gypsy files. Make sure you give it a new name. (Delete everything in the file name box after the c:/ and type in a new name)
2. Close the DS file. (You can leave DS open, just make sure your file is closed.)
3. Connect your Gypsy to your computer using the USB cord and power the Gypsy on.
4. Start the Cricut Sync program from your computer. (You may have to exit out of your Virus/firewall software if Gypsy screen doesn't move from showing CONNECTING)
If your Gypsy is up to date you will get this message:
5. Click the OK button and you’ll see the list of files on your Gypsy
(If you aren’t running the most recent Gypsy update you will need to run that first. Then come back here and start again at step 4. Here’s info on that: UPDATING GYPSY TUTORIAL )
6. When your Gypsy screen shows CONNECTED… open up Windows Explorer on your computer.
7. Adjust the size of the Windows Explorer window so it only covers half of your screen.
Your computer screen should look something like this:
 |
| Click photo to enlarge |
8. Navigate to the directory that contains the file you created with Design Studio. (Usually c:/mydocuments/cricut/projects)
9. Using your left mouse button click (and hold) on the file you want to copy to your Gypsy and drag it over to the Gypsy screen.
 |
| Click photo to enlarge |
10. Release the mouse button and the file will appear in the list of Gypsy files. (You can use the Ctrl key to select and copy multiple files)
11. When you have finished copying your files, click on the X in the top right corner of the Cricut Sync program to exit.
You’ll be taken back to the Gypsy Welcome screen.
12. Disconnect your Gypsy from your computer.
You’re now ready to use the file on your Gypsy.
Transferring Gypsy files to Design Studio
1. To transfer your Gypsy files to Design Studio we do the same basic process as above. At step 9 above click on the file from the Gypsy screen and drag it over and drop it into the Projects folder in Windows Explorer.
2. Once you have copied it to the projects folder, open Design Studio. (You can exit out of Cricut Sync now and disconnect from your computer)
3. In DS Select File, Open
4. Change the drop down File Name box to Gypsy Files
5. Select the Gypsy file you want to open and press Open
6. To cut the file with DS you will need to select File, Save As, give it a new name and select Cricut Files from the Save as Type drop down menu.
7. Give it a new name and press Save.
Don't forget: Files that are created on the Gypsy that have hidden contours will have those contours visible in DS. You will have to select each one and hide them again. (This is a known problem with the Hide Contour feature in DS). If you want to keep contours hidden always save your file as a Gypsy file.
Monday, 27 December 2010
Cartridges - which update?
If you're trying to download a cart to DS and can't find it, it may be because you're downloading the wrong update. Here's a list of all the carts and which update you'll find them in.
Note - any cart that says "Not in DS" is an Imagine cart (except for Smiley Cards) and can only be used on the Cricut Imagine. Therefore you won't find it in DS.
Get both updates here: DS Update
My tutorial on downloading and installing the updates is here: Downloading & Installing cart updates
Note - any cart that says "Not in DS" is an Imagine cart (except for Smiley Cards) and can only be used on the Cricut Imagine. Therefore you won't find it in DS.
Get both updates here: DS Update
My tutorial on downloading and installing the updates is here: Downloading & Installing cart updates
| Cartridge Name | Which update? |
| 3 Birds on Parade | Content Update |
| 50 States | Program |
| 9 Months | Content Update |
| A Child’s Year | |
| Accent Essentials | |
| All Mixed Up | |
| All Sports | Content Update |
| All Wrapped Up (Imagine) | Not on DS |
| Alphalicious | |
| Ancestry (Imagine) | Not on DS |
| Animal Kingdom | |
| April Showers | Content Update |
| Art Nouveau | Content Update |
| Art Philosophy | Content Update |
| Ashlyn’s Alphabet | |
| Audrey (Imagine) | Not on DS |
| Autumn Celebrations | Content Update |
| Baby Steps | Content Update |
| Base Camp | |
| Baseball | Program |
| Basketball | Program |
| Batman: The Brave and the Bold | Content Update |
| Beep Beep | Content Update |
| Berries & Cream (Imagine) | Not on DS |
| Best Images of 2006 | Content Update |
| Best Images of 2007 | Content Update |
| Best Images of 2008 | Content Update |
| Best Images of 2009 | Content Update |
| Best Images of 2010 | Content Update |
| Best of Pixar | Content Update |
| Best of Times | Content Update |
| Better Together (Imagine) | Not on DS |
| Beyond Birthdays | |
| Billionaire | Content Update |
| Birthday Bash | Content Update |
| Birthday Cakes | Content Update |
| B is for Boy | Content Update |
| Blackletter | Program |
| Blast Off (Imagine) | Not on DS |
| Block Party | Content Update |
| Bloom | Content Update |
| Blossoms (Imagine) | Not on DS |
| Botanicals | Content Update |
| Boys Will Be Boys | Content Update |
| Bubblegum Stripes (Imagine) | Not on DS |
| Bucaneer (Imagine) | Not on DS |
| Bump in the Night | Content Update |
| Cake Basics | Content Update |
| Calligraphy Collection | |
| Campin Critters | Content Update |
| Camp Out | Program |
| Car Decals | Content Update |
| Carousel | Content Update |
| Cars | Program |
| Celebrate with Flourish | Content Update |
| Celebrations | |
| Cheerful Seasons | Content Update |
| Cherry Limeade | Content Update |
| Chic & Scary | Content Update |
| Chore Chart | Content Update |
| Christmas | Program |
| Christmas Cards | Content Update |
| Christmas Cheer | |
| Christmas Village | Content Update |
| Christmas Wish (Imagine) | Not on DS |
| Cindy Loo | |
| Classic Font | Content Update |
| Country Carnival (Imagine) | Not on DS |
| Country Life | Content Update |
| County Fair | Content Update |
| Create a Critter | Content Update |
| Cricut Decals | Content Update |
| Cricut Essentials | Content Update |
| Cricut Everyday | Content Update |
| Crocs Rule | Content Update |
| Cupcake | Content Update |
| Cupcake Wrappers | Content Update |
| Cursive 120 | Program |
| Cuttin’ Up | |
| Daisy Chain | |
| Damask Decor | Content Update |
| Designer’s Calendar | |
| Destinations | |
| Dinosaur Tracks | |
| Disney Classics | Content Update |
| Don Juan | Program |
| Doodlecharms | |
| Doodletype | |
| Dreams Come True | Program |
| Dude! | Content Update |
| Easter 2010 | Content Update |
| Elegant Cakes | Content Update |
| Elegant Edges | Content Update |
| Elise (Imagine) | Not on DS |
| Elmo’s Party | |
| Enjoy the Seasons (Imagine) | Not on DS |
| Everyday Paper Dolls | |
| Everyday Pop-Up Cards | Content Update |
| Fathers Day | Content Update |
| Fabulous Finds | |
| Fancy Frames | Content Update |
| Fast Food | Content Update |
| Feeling Groovy | Content Update |
| Floral Emporium (Imagine) | Not on DS |
| Florals Embellished | Content Update |
| Flower Shoppe | Content Update |
| Forever Young | Content Update |
| Formal Occasion | Content Update |
| Four Legged Friends | Content Update |
| French Manor | Content Update |
| Freshly Picked | Content Update |
| From My Kitchen | |
| George & Basic Shapes | Program |
| Gingerbread | Program |
| Girl's Makeup Party | Content Update |
| Give a Hoot | Content Update |
| Go Canada | Content Update |
| Going Places | |
| Graphically Speaking | |
| Groovy Times | Content Update |
| Gypsy Font - Preloaded on Gypsy. Can't cut with DS | Program |
| Gypsy Wanderings - Preloaded on Gypsy. Can't cut with DS | Program |
| H2O | Content Update |
| Handy Man | Content Update |
| Hannah Montana | Program |
| Happily Ever After | Program |
| Happy Graduation | Content Update |
| Happy Hauntings | Content Update |
| Heirloom (Imagine) | |
| Hello Kitty Font | |
| Hello Kitty Greetings | |
| Heritage | Content Update |
| Hey Diddle Diddle (Imagine) | Not on DS |
| Holiday Cakes | Content Update |
| Home Accents | Program |
| Home Decor | Program |
| Hoot ‘n’ Holler | Content Update |
| Hopscotch (Imagine) | Not on DS |
| Independence Day | Content Update |
| Indie Art | Program |
| Industrial Glow (Imagine) | Not on DS |
| Inspired Heart | Content Update |
| Jasmine | |
| Jolly Holidays | Content Update |
| Joys of the Season | |
| JT (Imagine) | Not on DS |
| Jubilee | |
| Just Because Cards | Content Update |
| Just a Note | Content Update |
| Kate's ABC's | Content Update |
| Keystone | |
| Lacy Labels | Content Update |
| Learning Curve | Program |
| Life is a Beach | |
| Life's a Party (3 Birds) | Content Update |
| Live Simply | Content Update |
| Locker Talk | |
| Lori’s Garden (Imagine) | Not on DS |
| Lovely Floral | Content Update |
| Love Struck | Content Update |
| Love you a Latte | Content Update |
| Luau | Content Update |
| Lyrical Letters | |
| Makin’ the Grade | |
| Meow | Content Update |
| Mickey & Friends | Program |
| Mickey Font | Program |
| Mini Monograms | |
| Mini Monsters | Content Update |
| More (Imagine) | Not on DS |
| More Cards (Imagine) | Not on DS |
| Mother’s Day 2010 | Content Update |
| Mother's Day Bouquet 2011 | Content Update |
| Mr Frosty (Imagine) | Not on DS |
| MS All Occasions Cake Art | Content Update |
| MS Birthday Cake Art | Content Update |
| MS Elegant Cake Art | Content Update |
| MS Seasonal Cake Art | Content Update |
| My Community | Program |
| Mystic Gardens (Imagine) | Not on DS |
| My World | Program |
| Nate's ABC's | Content Update |
| New Arrival | |
| New Testament | Content Update |
| Nifty Fifties | Content Update |
| Noah's ABC Animals | Content Update |
| Nursery Rhymes | Content Update |
| Nursery Tails (Imagine) | Not on DS |
| October 31st | Content Update |
| Office Help | |
| Old West | |
| Once Upon a Princess | Content Update |
| Opposites Attract | |
| Ornamental Iron | Content Update |
| Ornamental Iron 2 | Content Update |
| Pack your Bags | Content Update |
| Pagoda | Content Update |
| Paisley | Content Update |
| Paper Doll Dress Up | |
| Paper Lace | Content Update |
| Paper Lace 2 | Content Update |
| Paper Trimmings | Content Update |
| Paper Pups | |
| Pet Shop | Content Update |
| Phrases | Content Update |
| Picturesque | Program |
| Pink Journey | Program |
| Plantin SchoolBook | Program |
| Playtime | Content Update |
| Pooh and Friends | Program |
| Pooh Font Set | Program |
| Pop-Up Neighborhood | Font Pack |
| Potpourri Basket | |
| Preserves | Content Update |
| Princess Party | Content Update |
| Printing 120 | Program |
| Printing Press | |
| Pumpkin Carvings | Content Update |
| Quarter Note | Content Update |
| Reminisce Accents | Content Update |
| Recess | Content Update |
| Ribbons & Rosettes | Content Update |
| Robot Party | Content Update |
| Robotz | Content Update |
| Rock Princess | Content Update |
| Sampler | |
| Sans Serif | Program |
| Santas Village (Imagine) | Not on DS |
| Savory | Content Update |
| Scandinavian Christmas Cards | Content Update |
| Sentimentals | Content Update |
| Serenade | Content Update |
| Sesame St Font | Program |
| Sesame St Friends | Program |
| Sesame St Seasons | Content Update |
| Shall we Dance? | Content Update |
| Simply Charmed | Content Update |
| Simply Scarecrows | Content Update |
| Simply Sweet | |
| Slumber Party | Content Update |
| Smiley Cards -Available through Gypsy download only. | Not on DS |
| Snapshot Everyday Colors & Patterns (Imagine) | Not on DS |
| Snapshot Nature Colors & Patterns (Imagine) | Not on DS |
| Snapshot Texture (Imagine) | Not on DS |
| Snow Angel (Imagine) | Not on DS |
| Snow Friends | Program |
| Soccer | Program |
| Something to Celebrate | Content Update |
| Songbird | Content Update |
| Sophie | Content Update |
| Sophisticated | Content Update |
| Space Party | Content Update |
| Speaking of Fall | Program |
| Speaking of School | Program |
| Speaking of Winter | Program |
| SpongeBob Squarepants | Program |
| Spring Holiday Cards | Content Update |
| Splish Splash | Content Update |
| Sports Mania | |
| Stamped | |
| Stamping | Program |
| Stand and Salute | |
| Stencil | Content Update |
| Stone Script | Program |
| StoreFront | |
| Storks Delivery | Content Update |
| Storybook | |
| Straight from the Nest | Content Update |
| Street Sign | Program |
| Street Sign | Program |
| Stretch your Imagination | |
| Sugar and Spice | Content Update |
| Summer Celebrations | Content Update |
| Summer in Paris | Content Update |
| Summer Vacation | Content Update |
| Superman | Content Update |
| Sweater Weather | Content Update |
| Sweet Tooth Boxes | Content Update |
| Sweethearts | |
| Sweet Shop | Content Update |
| Sweet Treats | Content Update |
| Tags, Bags, Boxes & more | |
| Tear Drop | |
| Thanksgiving | Content Update |
| Tie the Knot | Content Update |
| Tinker Bell & Friends | Program |
| 'Tis the Season | Content Update |
| Traveler | Content Update |
| Trim the Tree | Content Update |
| Toy Story | Content Update |
| Twinkle Toes | Content Update |
| Varsity Letter | Content Update |
| Very Merry Tags | Program |
| Vintage (Imagine) | |
| Walk in My Garden | |
| Wall Decor and More | Content Update |
| Wedding | Program |
| When It’s Cold Outside | Program |
| Wild Card | |
| Wildlife | Content Update |
| Winter Frolic | Content Update |
| Winter Lace | Program |
| Winter Woodland | |
| Word Builders: A Garden of Words | Program |
| Word Builders: A Word Party | Program |
| Word Builders: An Ocean of Words | Program |
| Word Collage | Content Update |
| Wrap It Up | Content Update |
| Yee Haw | |
| Yummy (Imagine) | Not on DS |
| ZooBalloo | |
| Zoo Day | Content Update |
Wednesday, 22 December 2010
Resizing pictures to upload to the message board
For a picture to actually show up in the message, it must be less than 1MB in size. There are several ways to resize your pictures. Here's a couple:
Make sure Percentage is selected then change the figure in the Horizontal box. The size you choose will depend on how big the original photo is. As a start try 50%.
Make sure "Maintain aspect ratio" is checked. The amount in the Vertical box will also change to 50%
After you have resized your photo, upload it to your thread on the message board.
If it only shows as a link, you will have to repeat the above process with the original file, this time using a smaller percentage.
I'll be using http://www.shrinkpictures.com/resize.php
(Search "resize pictures" for many other options.)
Go to http://www.shrinkpictures.com/resize.php
You'll see this box:
Your picture will be uploaded and resized.
After you have resized your photo, upload it to your thread on the message board.
1. Using Microsoft Paint. (You'll find it in Accessories on your computer)
- Open your picture in Microsoft Paint
For Windows 7:
- Click on Resize from the toolbar
Make sure Percentage is selected then change the figure in the Horizontal box. The size you choose will depend on how big the original photo is. As a start try 50%.
Make sure "Maintain aspect ratio" is checked. The amount in the Vertical box will also change to 50%
- Click the OK button.
- Click the first toolbar tab (next to the Home tab) and select Save As. (You don't want to overwrite the original photo.)
- Click on JPEG picture from the list of file types.
- Give your photo a new name and press the Save button
- Close the file by exiting out of Paint
For older versions of Microsoft Paint:
- Open your picture in Microsoft Paint
- From the Image menu select Resize/Skew
- Insert a new amount in the Horizontal box - 50%
- Insert the same amount in the Vertical Box - 50%
- Select OK
After you have resized your photo, upload it to your thread on the message board.
If it only shows as a link, you will have to repeat the above process with the original file, this time using a smaller percentage.
2. Using a photo resizing service from the web.
I'll be using http://www.shrinkpictures.com/resize.php
(Search "resize pictures" for many other options.)
Go to http://www.shrinkpictures.com/resize.php
You'll see this box:
- Click the Browse button, select your file and press Open
- Select Custom and type 1000 in the box
- Press the Resize button
Your picture will be uploaded and resized.
- Just above your picture you'll see:
- Click that, select a destination for your new picture and press OK/Save
After you have resized your photo, upload it to your thread on the message board.
Tuesday, 21 December 2010
Updating your email address at Cricut.com
The ability to change your email address is currently not available. I will update when the problem has been fixed.
If you have changed your email address you'll probably want to change it at cricut.com. Even though we have moved to the new messageboard at provocraft.com, all changes to your account still need to be completed at cricut.com.
Here's how:
Go to https://www.cricut.com/
If you aren't logged in click on Sign In.
(You'll see Welcome back {your username} at the top right corner if you are logged in)
At the next page type your existing email address and password the press the Sign In button
Once you are logged in click on "my account" from the menu.
At the next screen click on the edit button next to email address in the account details section
Delete the existing email address and type in your new one. (You can also change your password here if you wish).
Press the SAVE button.
You'll be taken back to the My Account page.
And you're all done!
Friday, 17 December 2010
Updating your Gypsy
My first Gypsy post! Now that I have my very own mini DS I thought it was time!
Today I updated my Gypsy to add the carts that were released in Hello Thursday and it worked!!!
Here's the step by step instructions:
Plug your Gypsy into a power outlet. (Downloading the updates takes a while and you don't want your battery to die half way through!)
Connect your Gypsy to your computer using the USB cord
Disable or turn off your virus software and firewall. (I use Trend Micro and I have to exit out of it completely as just disabling it doesn't work - it still blocks access to the Gypsy)
Power on your Gypsy. Wait for it to finish loading. Once the Welcome screen appears...
Open Cricut Sync from your computer. (If you haven't downloaded Cricut Sync yet you can get it here: http://www.cricut.com/imagine/support.aspx
You'll see this on your Gypsy:
You'll see this dialog box on your computer:
Press the Update Now button
You'll see this box:
Depending on the size of the update (and the speed of your computer/ADSL, AND how many others are downloading at the same time...) this could take a while...
For me this part of the update took approx 1 hour and 5 minutes.
Once it's finished downloading you'll see this box:
After about 5 minutes you'll see this box:
After another 5 minutes you'll see this box:
Then this box:
Finally, this box:
Exit out of Cricut Sync by clicking on the X in the top right corner.
If the Gypsy continues to stay connected:
Open up Gypsy Sync again. You should see this message:
Press the OK button
Exit out of Gypsy sync again and you should go back to the main Gypsy screen.
The total time for me was approx 1 hour 25 minutes and went without a hitch!
New Circle cart
PC have released the images for the next Circle cart. If you love it you can join the Circle to get it!
Cricut Everyday
NINE new carts for Hello Thursday
PC have outdone themselves this month. Nine great new carts, three of them Seasonal.
The Design Studio update is here: http://www.cricut.com/CDS/Update.aspx
The carts aren't listed there yet, but they are in the update. Car decals is there too now!
Font pack version is V101207.
There are two carts retiring this month - Locker Talk and New Arrival.
And now my favourite two carts.
You have outdone yourself PC! What a way to see the year out!
The Design Studio update is here: http://www.cricut.com/CDS/Update.aspx
The carts aren't listed there yet, but they are in the update. Car decals is there too now!
Font pack version is V101207.
There are two carts retiring this month - Locker Talk and New Arrival.
April Showers - Seasonal
Spring Holiday Cards - Seasonal
Mother's Day Bouquet - Seasonal
And here's the long awaited Pixar Cart
Best of Pixar
Been hankering for more Disney characters? Then you'll love this one!
Disney Classics
Got kids? Like doing ABC albums?
Nate's ABC's
And now my favourite two carts.
Groovy Times
Pack your Bags
Life is a Party
You have outdone yourself PC! What a way to see the year out!
Tuesday, 23 November 2010
Positioning your paper on the mat
This tutorial has been moved to my new blog.... here:
Please follow me over there!
Narelle ♥
Subscribe to:
Posts (Atom)
