Please come on over to my new blog and follow me there -
http://thenon-craftycrafter.blogspot.com.au/

I'll be transferring information to there from this blog as I get time. Any new tutorials/info will be posted there!


Friday 27 May 2011

Design Studio - March and April carts available to download

The Design Studio font pack has been updated to include the March and April cart releases!

Latest update is  FontUpdate_110412.exe. Click on the second Download button. Remember to save the download to your computer, then run the install file from there.

It looks like all the new carts have again been placed in the font category.

The download page has also had a bit of a face lift. Clicking on any of the cart names will take you to the Cricut.com shopping page where you can see some of the images and put it in your shopping cart to purchase.

Here's the link: http://www.cricut.com/CDS/Update.aspx

We're still waiting for the cartridge handbooks to be uploaded.


Monday 23 May 2011

Font list is finally updated!

With the release of April's Hello Thursday I can finally release the latest version of the Cricut Carts with Fonts list.

There was only one cart (American Alphabet) with a font in the April release (out of 17 carts!).

The carts haven't been added to Design Studio yet, but luckily they were added to Cricut Craft Room so I was able to get my screen shot from there.

I've also used CCR to get screen shots of the two Imagine carts that have fonts (Blast Off and Country Carnival) and have added them to the list.

Other changes to the list are:

Many of the screen shots have been redone in different colours so you won't be using up all the blue ink in your printer.

The blank spaces have been removed (I got a lot of requests asking for that to reduce the number of pages). The draw back to that is that you will have to print the whole document - not just the pages that had the changes on them.

However..... if you don't want to print the whole document I will add a link to a document that only has the new carts on it. You can then add that to the front of your print outs.

I'm also trialling a new file sharing site - Box.net. Hopefully you will find it easier to use than mediafire. I'm not sure of what my download limit it. I guess I'm about to find out! :) Please let me know if you have any problems downloading/accessing the files.

Here's the links:
US letter Full Fonts list: http://www.box.net/shared/rphxgel3lv
A4 Full Fonts list: http://www.box.net/shared/4x7tocdtr3
April additions only: http://www.box.net/shared/8603xh0gtz

As usual the files are PDF's. (To maintain the accuracy and integrity of the files I don't share the word documents.)

Just a reminder that there was no Hello Thursday in May. Can't wait for June!!


Friday 20 May 2011

Hello Thursday for April is finally here!

The April Edition of the Hello Thursday email arrived in my inbox this morning.

The handbooks haven't been added to the cartridge library yet.

Here is the link to download the Font Pack: http://www.cricut.com/CDS/Update.aspx

They have also been added to the Gypsy. If you don't have them make sure you run Cricut Sync to add them. 

The new carts for April are:

Cricut Essentials - available on Cricut Expression 2 Anniversary Edition
Cricut Alphabet (aka American Alphabet) - available on Cricut Expression 2 Anniversary Edition
Just a Note - Cosmo Cricket - exclusive to Cricut Expression 2 Anniversary Edition
Cricut Decals - exclusive to Cricut Expression 2 Anniversary Edition
Paper Lace 2 - available at cricut.com
Bump in the Night (Lite) - available at cricut.com
Beep Beep (Lite) - available at cricut.com
Crocs Rule (Lite) - available at cricut.com
Yee-haw (Lite) - available at cricut.com
Best Images of 2006 - available exclusively on HSN
Best Images of 2007 - available exclusively on HSN
Best Images of 2008 - available at cricut.com
Best Images of 2009 - available at cricut.com
Best Images of 2010 - available at cricut.com

Imagine cartridges:

Vintage Damask - available at cricut.com
Black & White (Teresa Collins) - available soon at cricut.com
Baby Boutique (Teresa Collins) - available soon at cricut.com

Carts retiring this month are:

Car Decals
Doodletype
Ornamental Iron
Printing 101

Here's some sample shots but for more great images from the carts check out the Cricut Blog: http://cricutblog.org/

Cricut Essentials


Cricut Alphabet 


Just a Note


Cricut Decals


Paper Lace 2 


Bump in the Night (Lite)


Beep Beep (Lite)


Crocs Rule (Lite)


Yee-haw (Lite)


Best Images of 2006

  
Best Images of 2007

  
Best Images of 2008


Best Images of 2009


 Best Images of 2010


Vintage Damask


Black & White (Teresa Collins)


Baby Boutique (Teresa Collins)


Wednesday 18 May 2011

The official Cricut Blog coming soon!

For your chance to win a $150 credit to Cricut.com check out Cindy's blog Royal Things for information on the soon to be released Official Cricut Blog.

Here's the link to the new blog which will launch early tomorrow. http://www.cricutblog.org/


(From looking at the count down clock at the blog it looks like it's going to launch at 4am Utah time.)


Tuesday 17 May 2011

Uploading photos to the messageboard

There are two ways to upload your photos to the Cricut messageboard.

1. Attaching them directly from your computer. For your photos to show in the message they must be less than 1mb (1,024kb) in size. If they are larger than 1mb they will show up as an attachment and anyone wanting to see the photo will have to click on the attachment to open it. For information on resizing your photos see this post: http://myfaqcricutds.blogspot.com/2010/12/resizing-pictures-to-upload-to-message.html

2. Uploading them to a photo sharing site (eg. Photobucket) and inserting the link into your post. Photobucket automatically resizes the photos for you using the settings you set when you're uploading them.

METHOD 1 - UPLOADING FROM YOUR COMPUTER

1. Create a new post on the messageboard and type your message in the message box.

2. Place a tick in the "Attach files to this post" box

3. Click the Post button


4. Click the Browse button and select the file you want to upload from your computer. Press Open and you'll be taken back to the above screen.

5. Click the Upload button.

If you want to select more photos repeat steps 4 & 5.

6. Once you have finished adding photos press the Back button.


Your photo will be added to your thread and will be posted to the board.


From this page you can edit your post (Press the Edit button) or you can attach more photos (press the Attach button).

If you want to delete your photo, press the Attach button then press the Delete option for that photo.


Press the OK button

Press the Back button and you'll be back at your post.

-----------------------------------------------------------------------------

METHOD 2 - UPLOADING FROM PHOTOBUCKET

1. Login to your photobucket account

2. Go to the album that contains your photo

3. Click on the photo you want to share.

4. To the right you will see a box with several links in it. Click inside the box labeled Direct link.


5. The HTML code that's inside the box will be copied to your clipboard.

6. Open your messageboard post (or create a new one.)

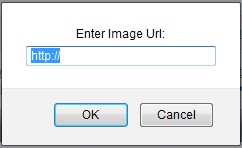
7. Click the Insert Image button from the toolbar.


You will see this dialog box:


7. Paste the code from your clipboard over the highlighted text. (Ctrl V or Edit, Paste)


8. Press OK


9. You can leave the next box blank. (Anything you type in this box will show up when someone hovers over your photo). Press OK

The HTML code of your photo will appear in your post. You can type your post text before or after this code.


10. Press the Post button OR if you want to check what your post will look like (eg to make sure the photo isn't too big) press the Preview button then the Post button when you're ready to post.

If you need to make any changes highlight the code and delete it, then repeat the above process again.