- Place an object from one of the DS cartridges on your virtual mat.
- Left click on any edge of the object to select it.
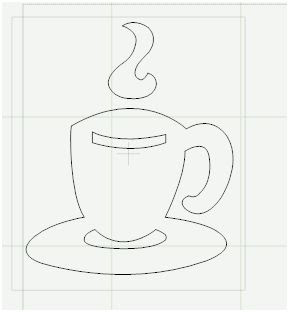
In the example above we'll hide the steam.
- Left click on the outline of the steam.
- Right click anywhere near the object and select Hide Selected Contour from the drop down menu.
- Press Enter or click elsewhere on the virtual mat.
- To make the steam appear again left click to select it.
- Right click and select Show Selected Contour from the drop down menu
And now to the "bug" in this new feature.
If you hide a contour in an object, then use the copy & paste function to copy the object the "hidden" contour won't be hidden in the pasted objects. (The "hiding" doesn't copy over).
Also, the "hide selected contour" function won't be available to the pasted objects when you right click. Very annoying. But there is a way around it.
After you have copied and pasted your objects, save your file then close it.
When you re-open the file the Hide contour feature should now be available.
