Please come on over to my new blog and follow me there -
http://thenon-craftycrafter.blogspot.com.au/

I'll be transferring information to there from this blog as I get time. Any new tutorials/info will be posted there!


Tuesday, 5 February 2008

Previewing your design without the non-cutting parts showing

The preview button in CDS is a great feature, but sometimes all the non-cutting parts of the design can be a distraction.

Here’s an example:

This is not a particularly “busy” design, but the non-cutting lines and the boxes around each object, together with the crosses in the middle of each object still make checking your design for errors a little difficult.

To preview your design without all these distractions:

Click the New Page button
Make sure you are viewing the new page and click the Preview button

Now you will see your design without any of the non-cutting parts showing, like below:

This also makes it easier to see that some objects may need to be moved or adjusted in size. For example, it’s now easier to see that the left hand side of the frame above is a little too long.

If you find later that you don't want this page as part of your saved design, just select View, Delete Page (or press Ctrl D). Make sure you are on the correct page of your design when you are performing this step as you can't un-delete a page!
More on welding inside a frame - "Burping" your design

Sometimes when you weld an object/word inside a frame and click Preview, the inside of the frame won’t have welded correctly.

Here is an example:

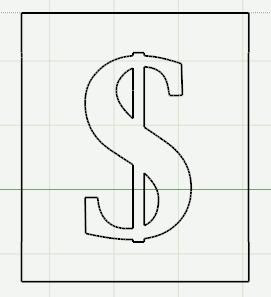
The dollar sign has been welded into a frame made using the Base Camp cartridge. Here’s how it looks before you click Preview:


And here is how it looks after you click Preview:


Notice how the inside of the frame doesn’t appear.

Shari (sboz) from the Cricut.com message board has come up with a great term called “Burping” that describes what you need to do. Essentially what has happened is that “air” has become “trapped” inside the frame. If you expel that air your frame will cut correctly.

“Burping” is easy. Just select the last part of the frame you created (in the example above it was the right hand vertical side of the frame).

  • Select Edit, Delete Shapes (or press the Delete key on your keyboard)
  • Select Edit, Undo Delete Shapes (or Ctrl Z on your keyboard)

Now when you click Preview, this is what you should see:

If your frame still isn’t showing correctly, follow the above procedure again deleting different parts of the frame until you get the correct result.