There are two ways to weld. They are:
METHOD 1:
All letters/pictures are typed into the one "object box". Here's an example:
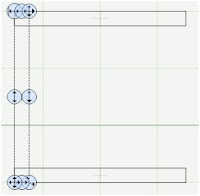
Notice how there is one set of selection handles and one object box surrounding the entire word.
PROS:
It's quicker
You only need to click Weld once
You can reduce/enlarge and copy the whole tile at once
The Nudge feature works
CONS:
You can't rotate/skew/flip individual letters
You can't change/delete or insert letters in between existing letters without backspacing from the last letter
METHOD 2:
Each letter/picture is created as its own "object". Here's an example:
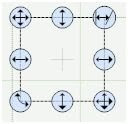
Notice how each letter has a box around it. In the example above the last D has been selected and it's the only letter with the selection handles showing. Any changes you make will only happen to THAT letter.
PROS:
You can rotate/flip/skew/move/stretch individual letters
You can weld multiple fonts/objects together
CONS:
You have to click Welding on EACH object.
The Nudge feature doesn't work. You must use the selection handles or the arrow keys on your keyboard to move your object.
Welding using Method 1
Select a font cartridge from the cartridge library and make it active.
Using your computer keys (or using the mouse to select the keys on the virtual keypad) type the letters DAD onto the mat.
With the kerning figure set to 0.000 click the Apply button
The 3 letters will move closer together.
Click on any edge of the A. It will change to a dotted outline.
Click the left Nudge button several times until the A slightly overlaps the first D. (You may want to change your view to 100% or 200% to better see the overlap.)
Select the second D and use the Nudge button to move it so it is also just overlapping the A. (In this case I moved it to the right. You can also use the up and down nudge buttons to move the A and the last D up or down.)
Making sure the word is still selected, tick the Welding box
Click the New Page button (Previewing from a new page clearly shows which lines your Cricut will cut.)
Click the Preview button
This should be your result:
If you're not happy with the result, return to the page with design on it and nudge your letters again. Make sure you return to the page with the design on it to cut with the Cricut.
Welding using Method 2
Select a font cartridge from the cartridge library and make it active.
Type the letter D onto the mat.
Press Enter on your keyboard
Type the letter A
Press Enter
Type the letter D
Press Enter
Each letter is a separate object (each letter has its own object box around it) and can be manipulated in any way, whilst not effecting any of the other letters.
Let's make a change to the A.
Select the A
Using the Proportional stretch button (bottom right handle) stretch the A to make it bigger.
Now we'll weld the letters together.
Move the A over so it just overlaps the outer edge of the first D. (Don't move it over the inside edge of the D or the middle of the D won't cut out).
Remember you can use your mouse to move the object by clicking on the Free Move handle (the top left handle) or by using the arrow keys on you keyboard. Use the CTRL key with the arrow keys to move the object in smaller increments.
Select the second D and move it over so it just overlaps the outer edge of the A.
Select the first D and check the Welding box
Select the A and check the Welding box
Select the second D and check the Welding box.
Your preview should look something like this:
